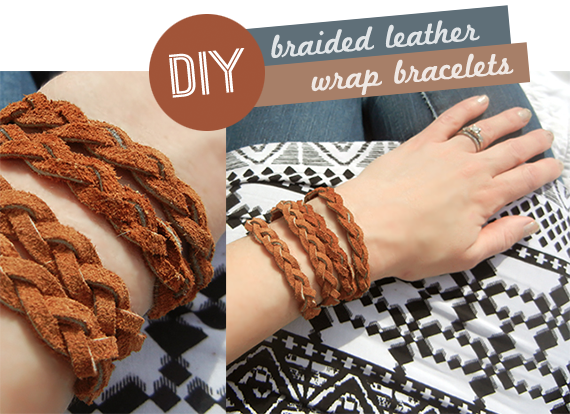
Like many others, I've been all about the arm party for the last couple of seasons. My left wrist tends to be filled with an abundance of stacked bracelets that combine colors and textures, natural fibers and metal hardware. Of all the bracelets contributing to the mishmash of goodness so often littering my arm, my absolute favorite is a simple leather braided wrap bracelet. I'd been seeing similar styles at some of my favorite stores, but they seemed a little overpriced for the materials and labor involved. So I decided to take things into my own hands (errr, wrists), and make a couple myself. It's a super fast project, and you can make two or three of them for around $5!
Before you begin, gather all of your supplies and find a nice, comfy space to work. (As with all of my tutorials, I have to suggest putting on your favorite music too. Music makes every project more fun. Promise.)
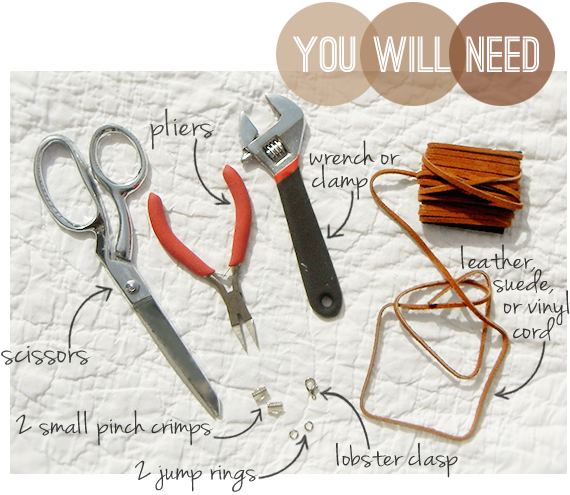
A couple of notes: The wrench/clamp is completely optional. You'll see why I use it later, but it's not required. You can purchase all of the materials (cord, pinch crimps, jump rings and lobster clasp) at almost any craft or jewelry supply store. Also, if you prefer materials without animal products, you can easily use vinyl or faux suede cord in place of leather.
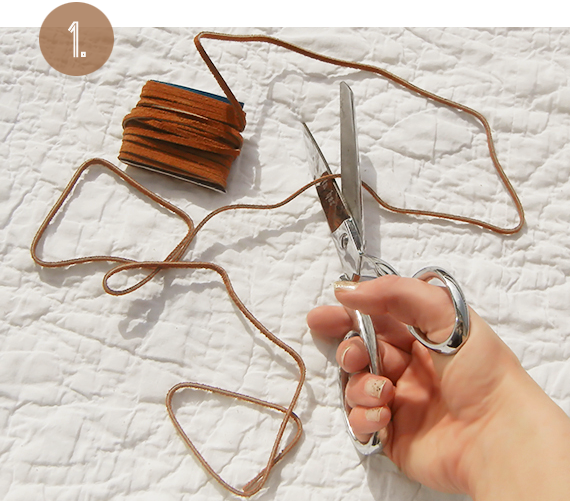
1. Cut a piece of cord long enough to wrap around your wrist 3-4 times. I opted for a piece that I could wrap around 4 times, just to be safe.
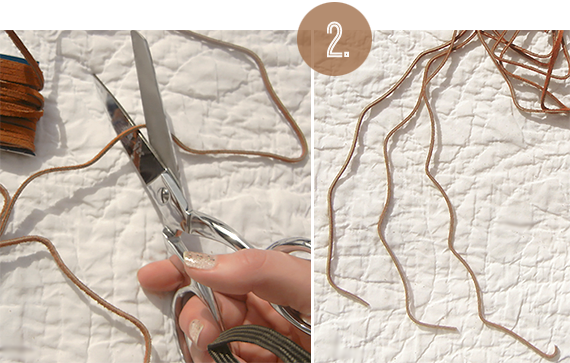
2. Cut two more pieces of cord the same length as the first, so that you have three total.
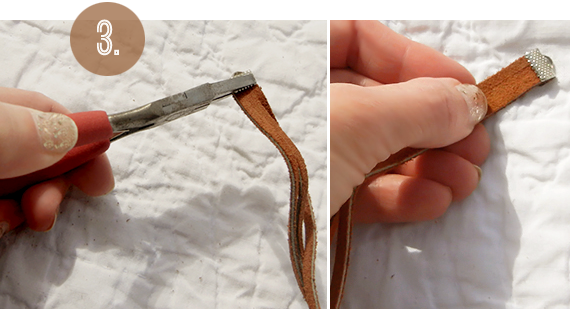
3. Hold your three pieces of cord together at one end, making sure the ends are lined up. Then take one pinch crimp, place it over the ends, and squeeze shut with your pliers to secure it in place.
4. Here's where the clamp comes in. If you have a wrench, a clamp, or even a clothespin, you can use it to hold the end of the pieces of cord to a table or shelf, which makes it easier (and faster!) to braid evenly. Everyone has their own methods for braiding, so do what works for you. Just make a simple three-strand braid with your pieces of cord, all the way to the ends.
5. Take your unfinished braided bracelet and wrap it around your wrist to make sure that it fits around twice, and mark the end by holding it between your fingers. Add about half an inch to that, then cut off the excess.
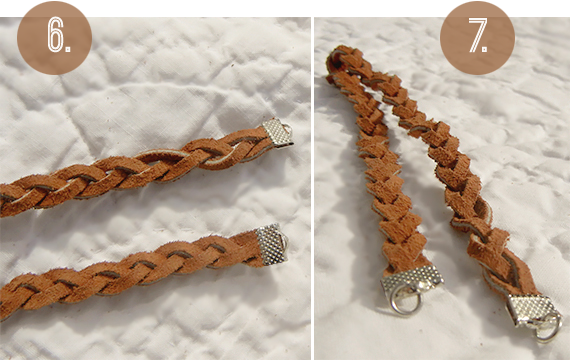
6. Use a pinch crimp to secure the other end, the same way you did in step 3.
7. Use your pliers to open your jump rings, then attach one to each pinch crimp. Close one of the rings (again, using your pliers), and leave the other slightly open.
8. Slide your lobster clasp onto the open jump ring, then use your pliers to close the ring.
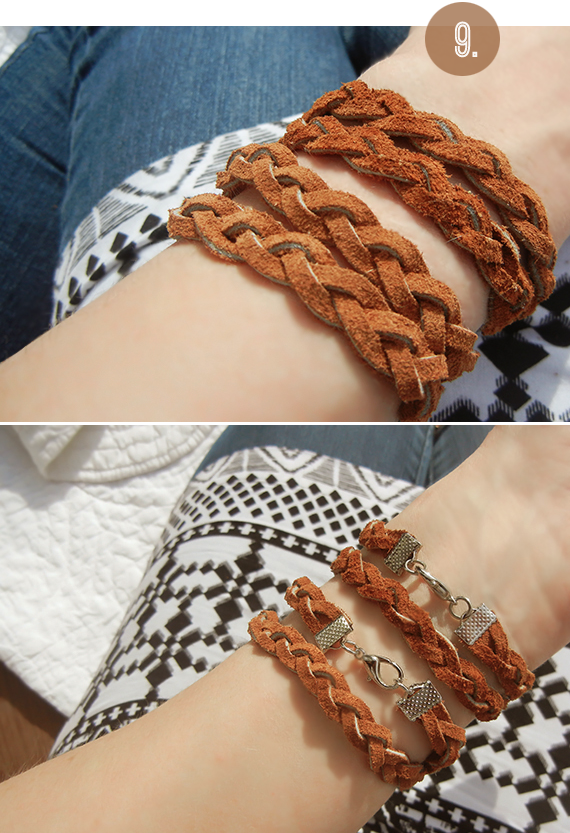
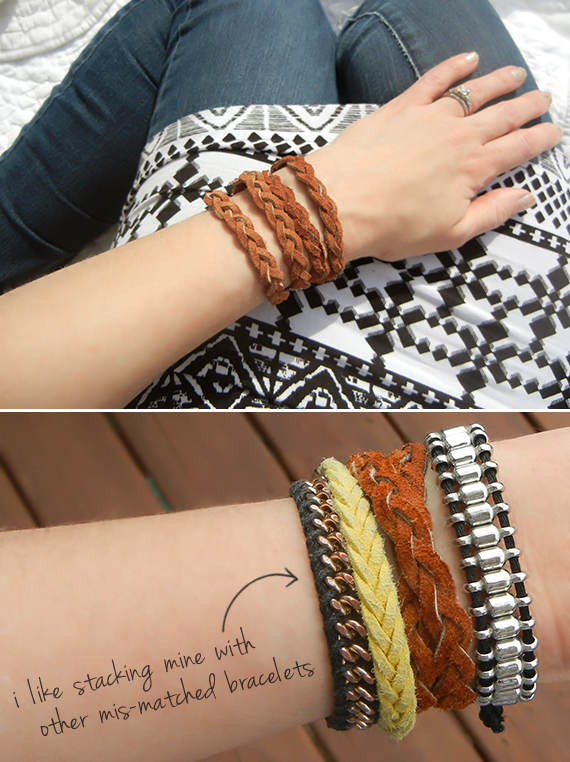
8. Put your bracelet(s) on your wrist! If you're feeling extra sassy, make two or three of them. The best part about these is that they look even better as they get worn in. (I've been wearing the one closest to my hand for a few weeks; the other one is new). There are a ton of variations you can do with this bracelet too, so feel free to get creative. You can double the measurements and make one bracelet that wraps four times instead of just twice. Or you can cut the cord lengths in half and make a bunch of single bracelets that don't wrap. Try experimenting with different colors, or add beads or metal studs. The possibilities for your arm party are endless, my friends. Endless.
Again, this project is easy, cheap, fast, and fun. These bracelets would also make great gifts for your friends or other stylish acquaintances. If you use this tutorial to make your own bracelets, I'd love to see some pictures!


Love the DIY! Also love leader AND braids :)
ReplyDeleteThis is awesome!! :-) I've been seeing these around everywhere too, I'm so excited to make some!!
ReplyDeleteHahaha, I love the phrase "arm party." I might have to start using that one.
ReplyDeletePinning this. :-)
I love the clasps you used, I feel it really gives them a polished look as opposed to just tying them off at the ends.
ReplyDelete<3 mybunnygoboom.com
Great tutorial, I love bracelets, and these ones are lovely!
ReplyDeleteI would love to make these especially all different colors and layer them :D
ReplyDeletethese are so pretty. what a great suggestion to use a clamp for the braiding. can't wait to make these.
ReplyDeleteYou can also use a clip board with a paper towel under the clip, so as not to mar your leather, to keep enough tension on your leather to make your braiding even.
ReplyDeleteI love leather and metal!
Great tip! Thank you! xo, melissa
DeleteSo cute and simple! More fun than just buying them!
ReplyDeletexo Heather
http://ahopelessnotebook.blogspot.com/
So Pretty!
ReplyDeleteThanks for posting this lovely DIY:)
I bought a hundred of these when I studied abroad and now they are scattered all over my room in various drawers ... your post inspires me to pull them out and start sporting them again!
ReplyDeleteGreat DIY my daughter will love to try! =)
ReplyDeleteThanks for the post.
~Kim
visiting today from Blogging Buddies
Your DIYs are amazing! They're laid out so great. Found you on bloglovin' and I'm lovinggg. Keep up the great posts. Xo.
ReplyDeletewww.lisapriceinc.com
Thanks for the sweet comment!
ReplyDeleteLove this DIY! I love these bracelets but they are way overpriced anywhere you go for what the material and work is! I'm going to have to try this!
Following you!
xx
Giovanna
www.oliveandanarrow.com
Oh these are super cute...and easy to make! Love this DIY!
ReplyDeleteGreat tutorial, Melissa! :)
ReplyDeleteThanks so much for your comments you guys! Don't forget to email us pictures if you make your own. :) xo, m
ReplyDeleteThese are awesome - love the colored ones :)
ReplyDeleteAnnie
The Other Side of Gray
what an awesome diy! im heading to the craft store after work!
ReplyDeleteThis is great! I brought home a bunch of leather samples from work the other day, not knowing what to do with them. Thank you for the inspiration. http://bethanybeachdesigns.com/2012/08/12/happy-scraps/
ReplyDeleteGreat tutorial! I featured it in one of my post! It will go live today at 2:30 PM EST.
ReplyDeletehttp://fromadaughter.blogspot.com